
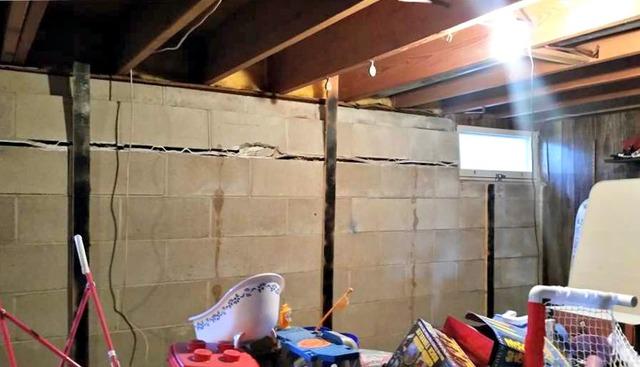
Severe Bowing Walls Before Installation
The wall was severely bowing and needed to be stabilized before the foundation failed.
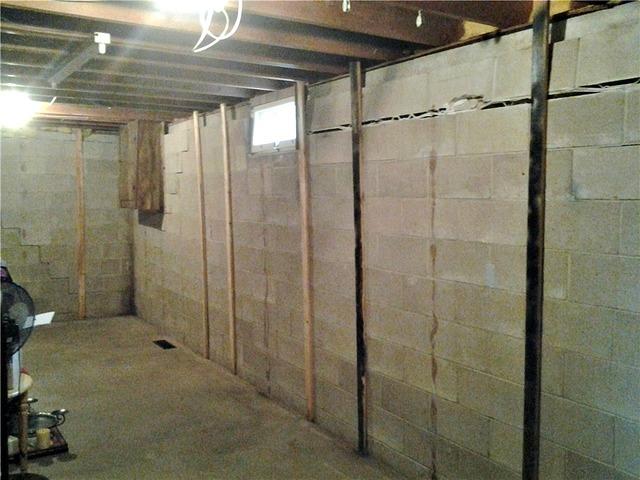
Before Wall Anchor Installation
Over time, the crack had gotten larger and Joe was worried about the stability of his foundation.
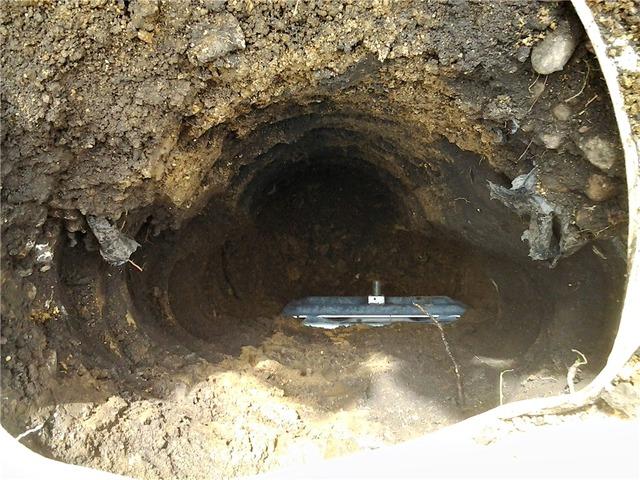
Hole Dug to Secure Anchor
The rod is drilled through the brick wall to the outside soil. The rod is then secured with a plate. This ensures that his basement walls will be supported.
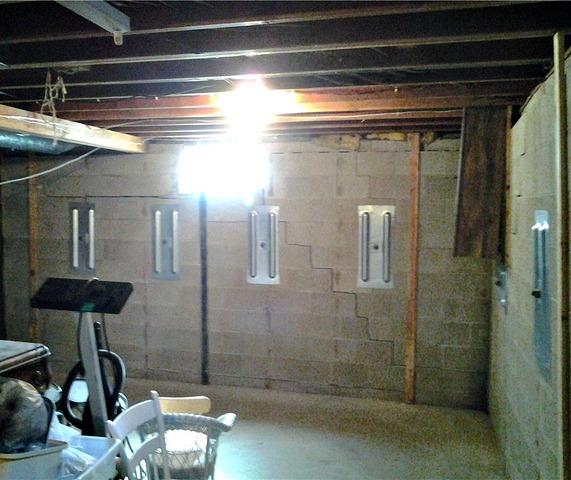
After Wall Anchor Installation
Once the anchors were tightened, the walls began to straighten. They will also continue to straighten over time, and the homeowners have a kit to continue tightening the anchors.
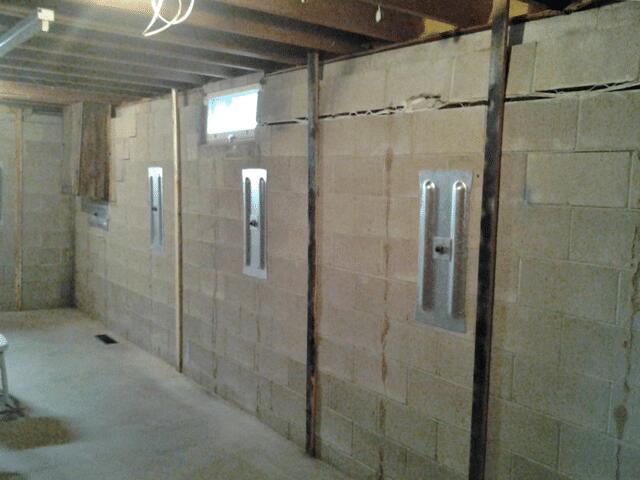
After Wall Anchor Installation
The anchors have been installed and tightened. The walls are now permanently stabilized.