

Pre-Installation
Deborah's retaining wall was cracking and deteriorating, so she requested a FREE no-obligation estimate with our Design Specialist, Shane Nephew.
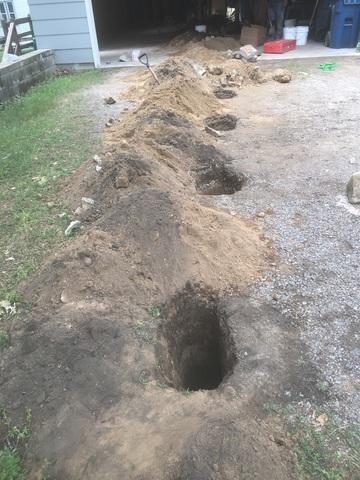
Digging of Holes to Install Anchors
Our Foreman, Juan Pena, and his crew dug five holes in the gravel driveway to begin the GeoLock Wall Anchor installation.
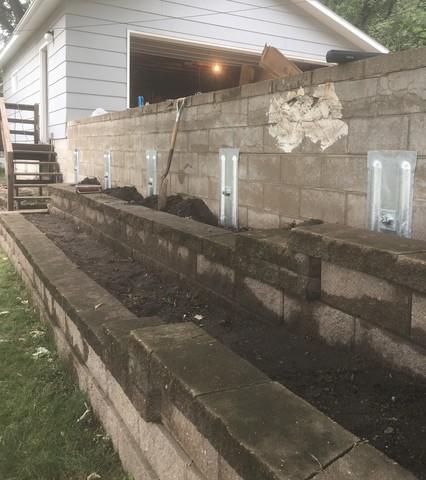
Anchor Installation
After inserting the rods, our team tightened and secured an anchor to the ends of each rod to stabilize and repair the retaining wall.
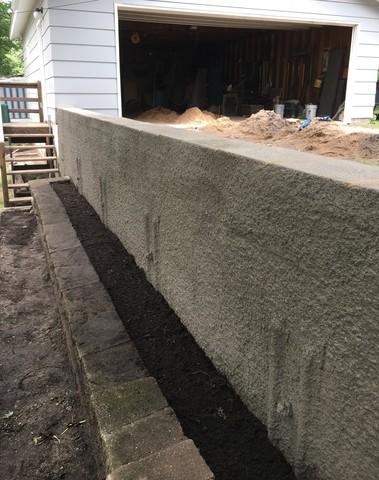
Shotcrete Installation - Project Complete!
Juan and his team sprayed 200 feet of Shotcrete over the entire wall to rebuild Deborah's retaining wall and repair her peace of mind!