
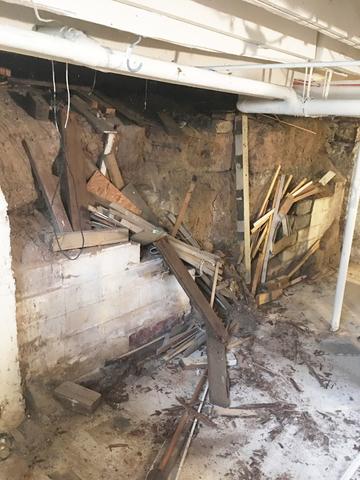
Pre-Project Failing Wall
Our customer was tired of water entering through her poorly covered crawl space and finally decided to fix the issue before more damage could be done.
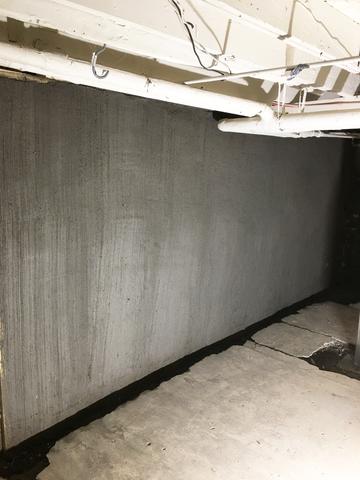
During Install - ShotLock
Our crew fixed the failing wall by installing our ShotLock wall stabilizing solution. This process entails straightening the wall using our PowerBrace I-beams, adding steel rebar between the braces, and then encasing it in a high-pressure sprayable concrete.
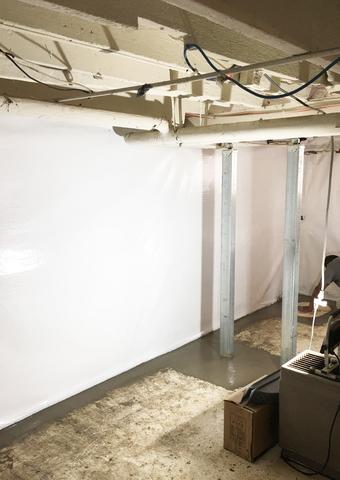
Post-Install
Our crews completed the project by wrapping the walls in our CleanSpace, a tarp-like material that traps water, leading it down the wall into our WaterGuard drainage system, that then deposits the water to the appropriate place.